
Deutsch
AeroWave E Serie Benutzerhandbuch
MODELLNAME
-
VSF-AWE6
-
VSF-AWE6W
-
VSF-AWE6-G2
-
VSF-AWE6W-G2
-
VSF-AWE9
-
VSF-AWE9W
HAUPTEIGENSCHAFTEN
-
DOPPELKUGELLAGER-EC-MOTOR : Ausgestattet mit einem hochzuverlässigen, effizienten und fortschrittlichen EC-Motor.
-
EXTERNES NETZTEIL : Der Niederspannungsadapter sorgt für einen sicheren Betrieb und reduziert gleichzeitig das Gewicht und die Wärmeentwicklung des Ventilators.
-
PATENTIERTER QUADRAT-CLIP : Der spezielle quadratische Clip ermöglicht die Befestigung an jeder Stangenform, ohne dass ein Abrutschen droht.
-
KOMPATIBEL MIT VIVOSUN SGS : Kompatibel mit dem VIVOSUN Smart Grow System für präzise, Fern- und Smart-Steuerung.
-
PWM-SMART-STEUERUNG : PWM-Tuning ermöglicht eine präzise Regelung der Ventilatorgeschwindigkeit auf jeder Stufe und bietet einen natürlichen Windmodus.
-
SCHLANKER SOCKEL : Das minimierte Sockeldesign sorgt für maximale Effizienz und optimierten Luftstrom.
PRODUKTINHALT
| Bild | Name | Anzahl |
|---|---|---|
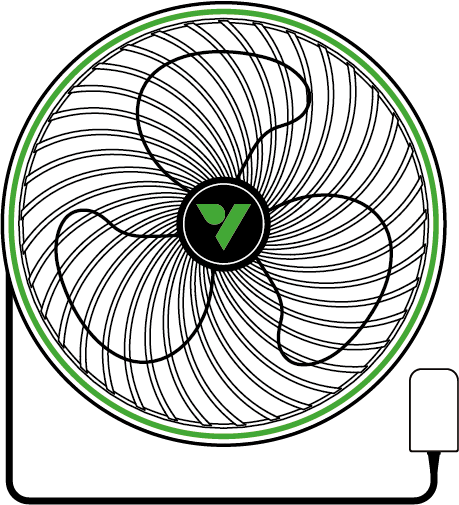
Ventilator |
1 Stk. |
|
|
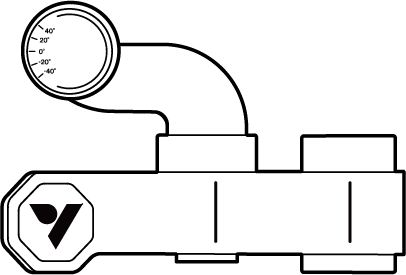
Klammer |
1 Stk. |
|
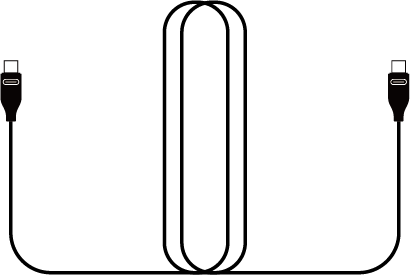
Typ-C Verlängerungskabel |
1 Stk. |

|
Kabelbinder |
3 Stk. |
|
Drahtbinder |
1 Stk. |
TECHNISCHE DATEN
VSF-AWE6 |
VSF-AWE6-G2 |
VSF-AWE9 |
|
Durchmesser |
6 Zoll / 152 mm |
6 Zoll / 152 mm |
9 Zoll / 228 mm |
Farbe |
Weiß/Schwarz |
Weiß/Schwarz |
Weiß/Schwarz |
Motor |
EC-Motor |
EC-Motor |
EC-Motor |
Anzahl der Automatischen Oszillation |
1 |
5 |
1 |
Anzahl der Geschwindigkeitseinstellungen |
5 |
5 |
5 |
Anzahl der Geschwindigkeitsstufen im Natürl. Wind-Modus |
1 |
5 |
1 |
Timer |
× |
√ |
× |
Horizontale Oszillation |
90°(±45°) |
90°(±45°) |
90°(±45°) |
Vertikaler Winkel-Einstellbereich |
80° |
80° |
80° |
Luftstrom |
543.6 m³/h |
543.6 m³/h |
986.2 m³/h |
Lärmpegel |
33 dB(A) |
33 dB(A) |
36 dB(A) |
Stromverbrauch |
12W |
12W |
18W |
Kraftantrieb |
12V/1.0A |
12V/1.0A |
12V/1.5A |
Eingabe |
100-240V AC 50/60Hz |
100-240V AC 50/60Hz |
100-240V AC 50/60Hz |
Wasserdichtigkeitsbewertung |
IP54 |
IP54 |
IP54 |
Betriebstemperatur |
32-140°F / 0-60°C |
32-140°F / 0-60°C |
32-140°F / 0-60°C |
Länge des Netzkabels |
100 Zoll / 254 cm |
100 Zoll / 254 cm |
100 Zoll / 254 cm |
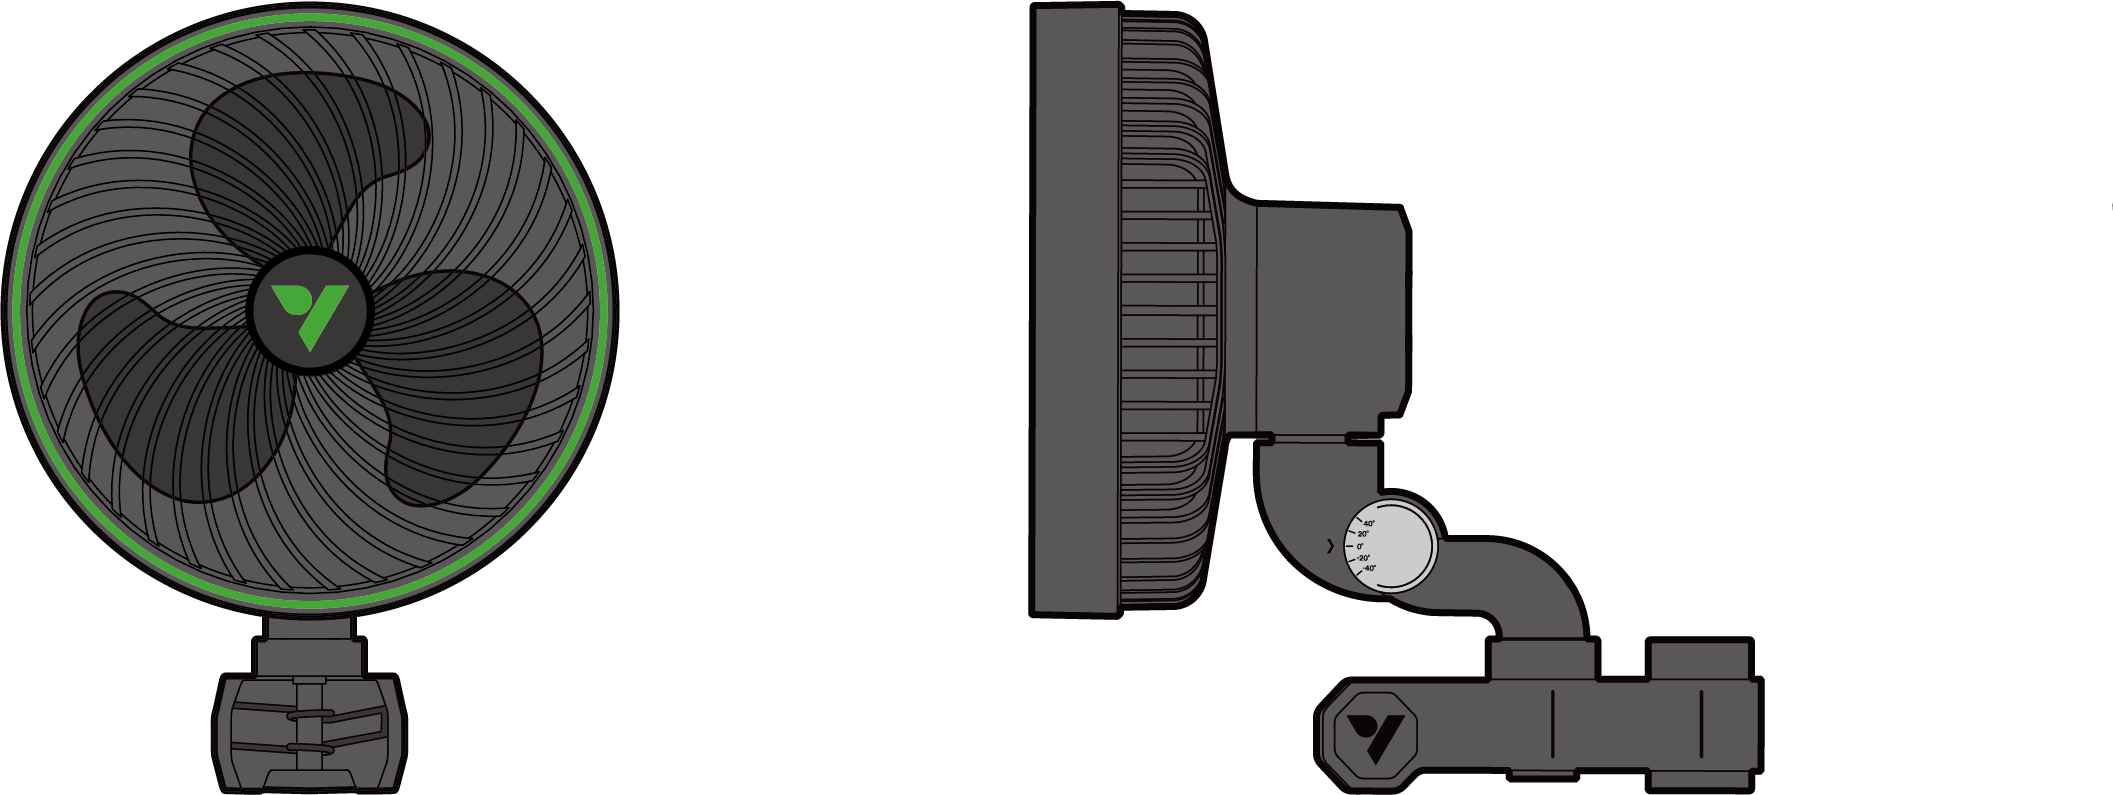
PRODUKTAUFBAU
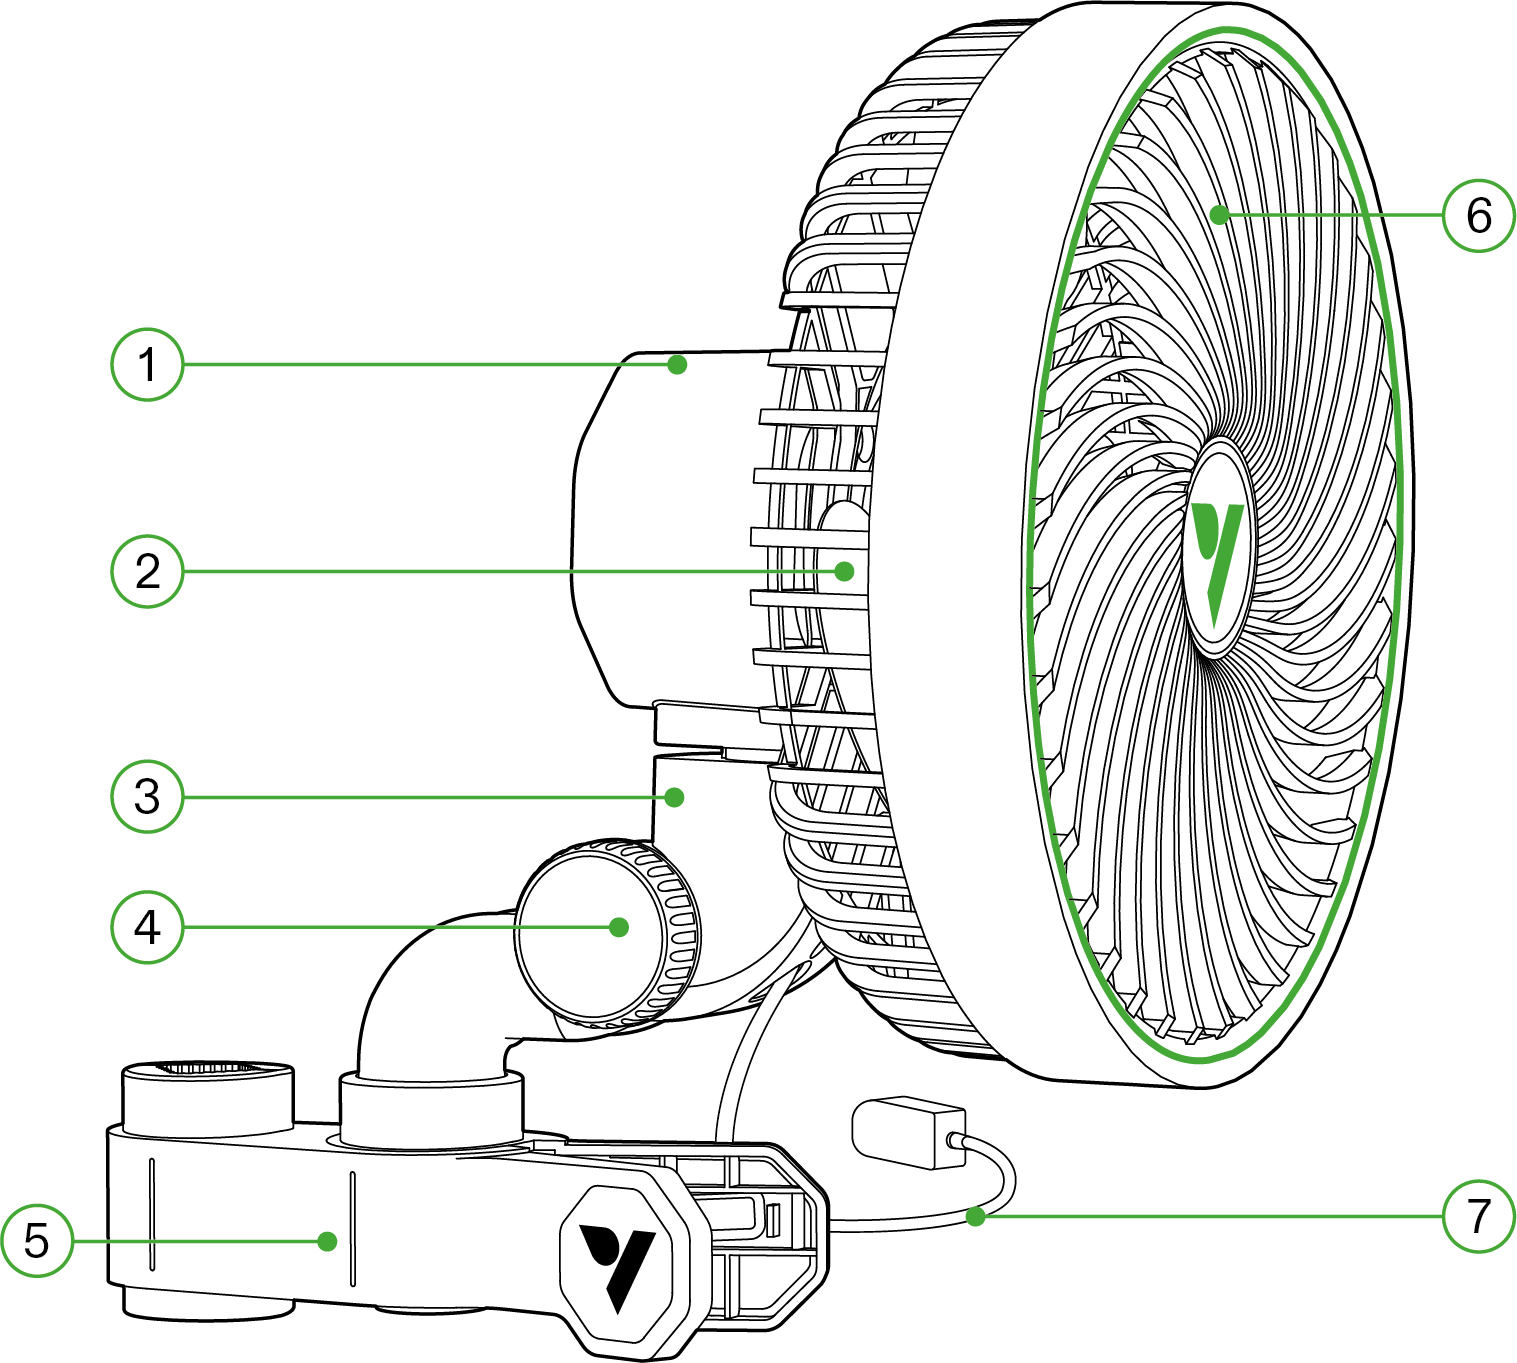
Nummer |
Beschreibung |
Nummer |
Beschreibung |
① |
Steuerknopf |
⑤ |
Halteklammer |
② |
Ventilatorblatt |
⑥ |
Schutzvorderdeckel |
③ |
Typ-C-Schnittstelle |
⑦ |
Netzadapter |
④ |
Neigeknopf |
INSTALLATION
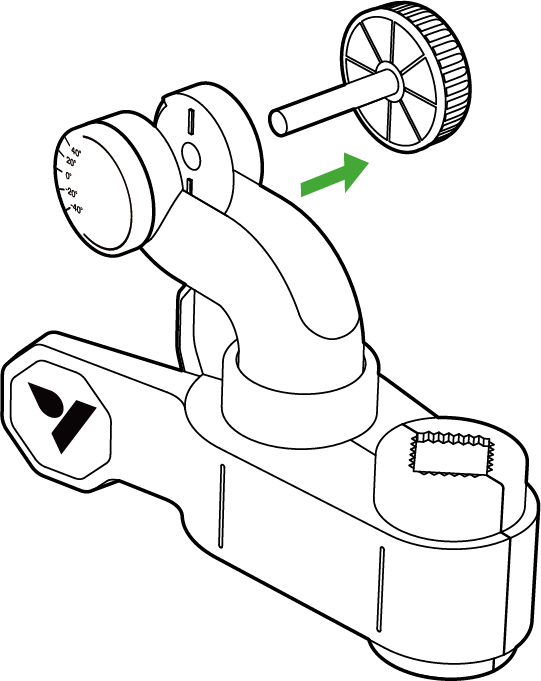
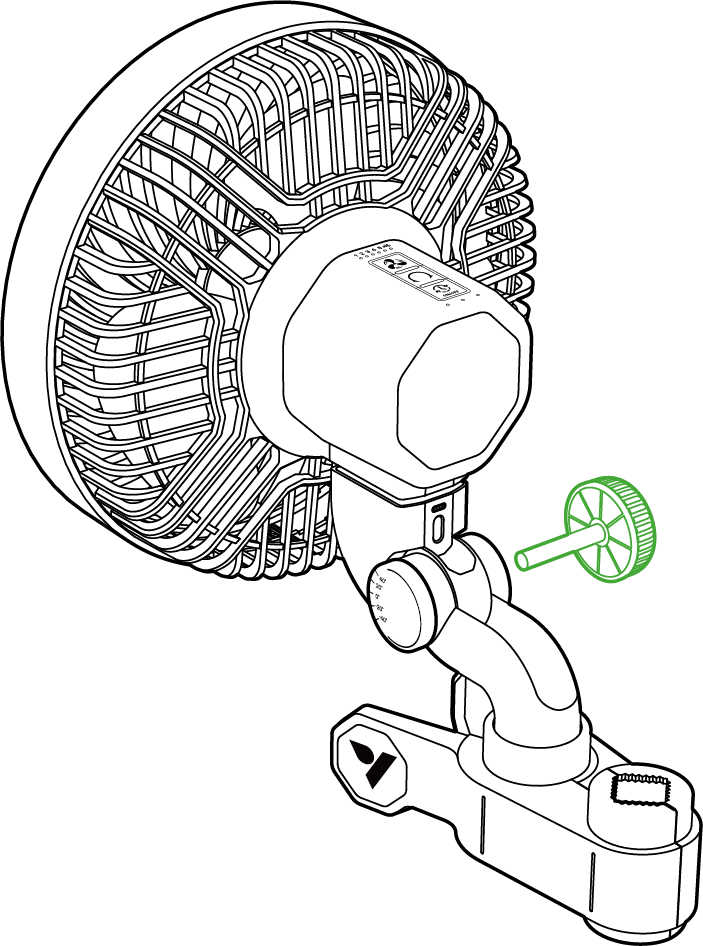
SCHRITT 1
Drehen Sie den Knopf gegen den Uhrzeigersinn, bis er sich vom Griffclip löst.
Ziehen Sie das kleinere Stück des Knopfes vom Griff weg.
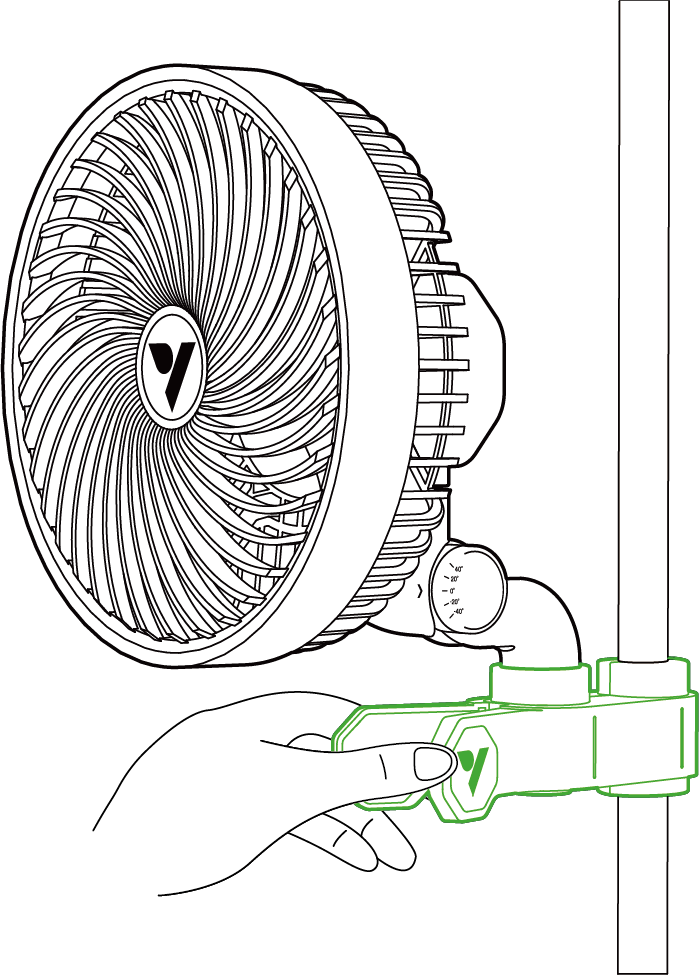
SCHRITT 2
Schieben Sie das Befestigungsteil des Ventilators in das Gehäuse des Drehclips. Stellen Sie sicher, dass der Ventilator sicher befestigt ist, indem Sie den Drehclip um den Ventilator schließen.
*Beispielfoto - E6 Gen2
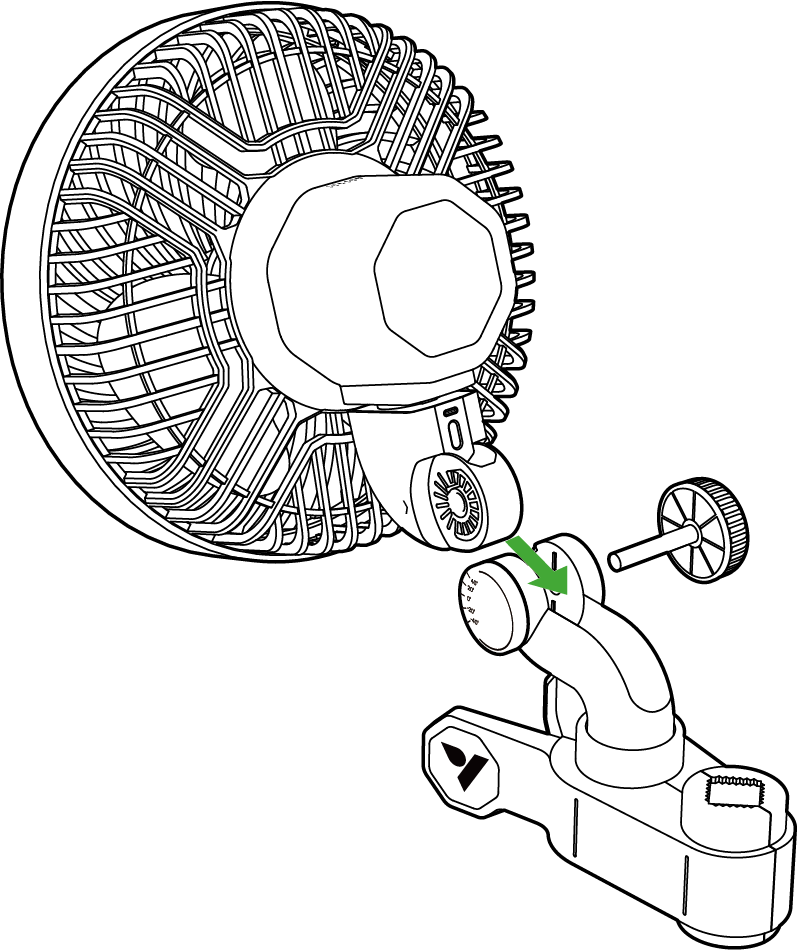
SCHRITT 3
Drücken Sie den Neigeknopf durch das Wellenloch und ziehen Sie ihn im Uhrzeigersinn wieder fest.
*Beispielfoto - E6 Gen2
SCHRITT 4
Befestigen Sie den Ventilator an Ihrer Zeltstange oder einer anderen Stange und stellen Sie sicher, dass er sicher sitzt.
SCHRITT 5
Stecken Sie den Netzadapter in eine Steckdose.
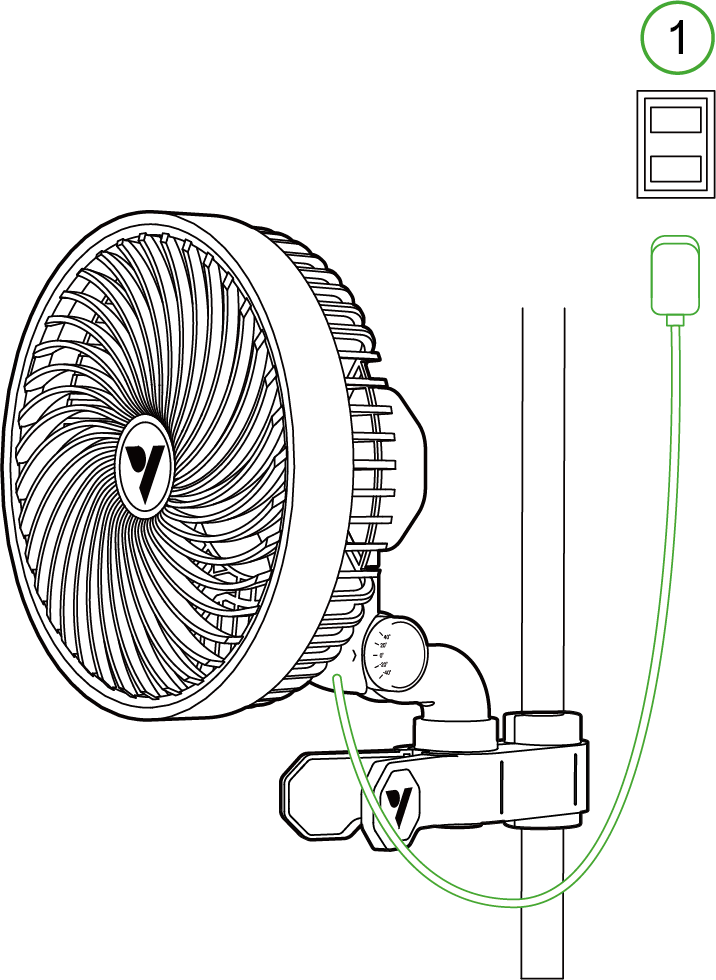
*1. Netzsteckdose
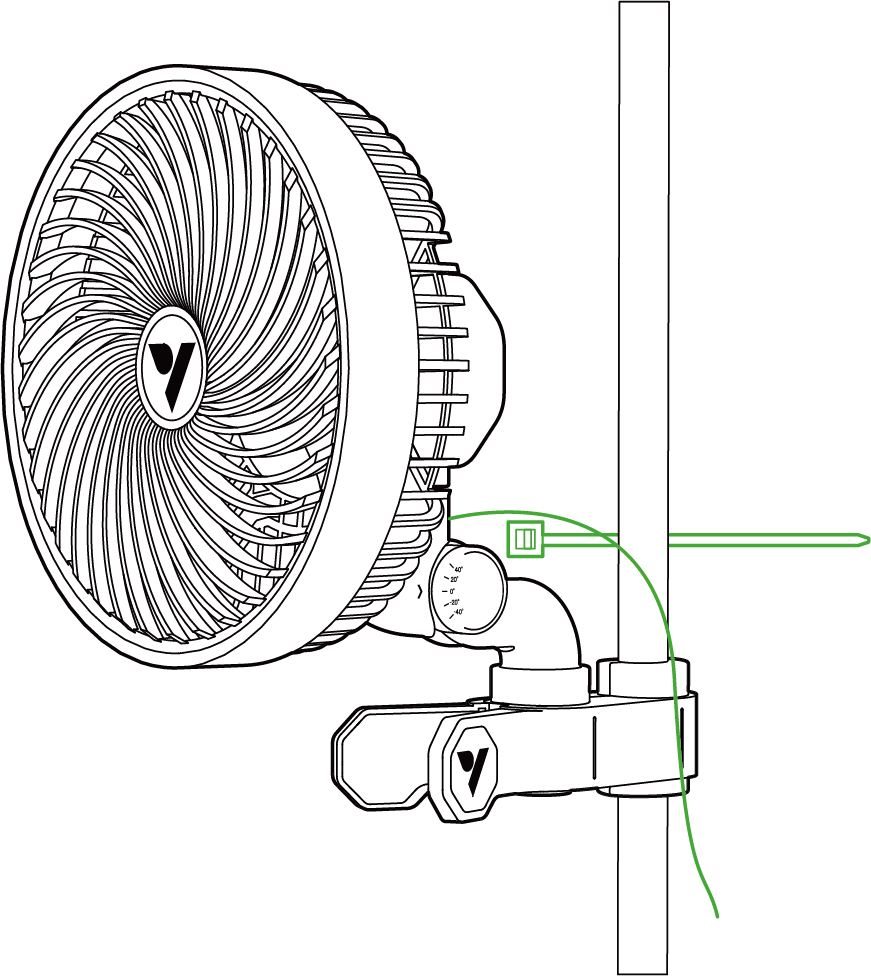
SCHRITT 6
Finden Sie eine saubere und sichere Oberfläche, an der Sie den Ventilator befestigen können. Sobald der Montagepunkt gesichert ist, verwenden Sie den mitgelieferten Kabelbinder, um das Kabel zu bündeln und es an der vorgesehenen Stelle zu befestigen.
LOKALER BETRIEB
E6/E9 SERIE GEN 1

|
VENTILATORGESCHWINDIGKEIT EINSTELLEN - Einmal drücken: Schaltet den Ventilator ein und wechselt zwischen den Geschwindigkeitsstufen (0 - 5 Stufen, natürl. Wind-Modus) - Anzeigeleuchte: Die grüne Anzeigeleuchte zeigt die aktuelle Geschwindigkeitsstufe an. |
|
AUTO-OSZILLATION - Einmal drücken: EIN/AUS - Anzeigeleuchte: Die weiße Anzeigeleuchte zeigt den Gang an. |

Die Auto-Oszillation kann nur über die Schwenktaste aktiviert/deaktiviert werden und kann nicht über externe Controller oder die Vivosun App gesteuert werden.
Warnung: 24-Stunden-Oszillation kann die Lebensdauer des Clip-Ventilators verkürzen.
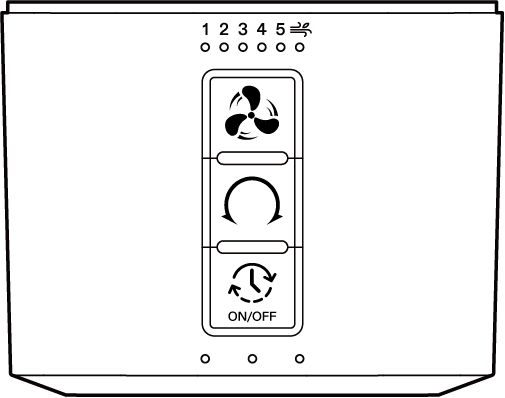
E6 GEN 2- SERIE
|
VENTILATORGESCHWINDIGKEIT EINSTELLEN - Einmal drücken: Schaltet den Ventilator ein und wechselt zwischen den Geschwindigkeitsstufen (0-5 Stufen) . - Gedrückt halten: Umschaltung der Betriebsmodi, schaltet zwischen Normalbetrieb und natürl. Wind-Modus um. - Anzeigeleuchte: Das grüne Licht zeigt die aktuelle Geschwindigkeitseinstellung an, und die Anzeigeleuchte für Naturwind leuchtet auf, wenn der Naturwind-Modus aktiviert ist. |
|
AUTO-OSZILLATION - Einmal drücken: Schaltet die Oszillation ein, durchläuft die Oszillationsstufen (0-5 Stufen) - Anzeigeleuchte: Weiße Anzeigeleuchte zeigt den aktuellen Wasserstand an. |
|
ZYKLUS EIN/AUS - Einmal drücken: Wenn das Gerät eingeschaltet ist, wird die Timerfunktion mit wählbaren Optionen aktiviert. Wenn das Gerät ausgeschaltet ist, schaltet es sich ein. - Zyklus Beispiel - Anzeigeleuchte: Grüne Anzeigeleuchte zeigt die aktuelle Timer-Option an. - Gedrückt halten: Ausschalten und die aktuelle Einstellung beibehalten. |

Warnung: 24-Stunden-Oszillation kann die Lebensdauer des Clip-Ventilators verkürzen.
CONTROLLER EINSTELLEN
GROWHUB CONTROLLER E25
Kabel einstecken: Stecken Sie das E25-Kabel in den Typ-C-Anschluss Ihres AeroWave. Das Gerät wechselt automatisch in den WLAN-Konfigurationsmodus. Während dieses Vorgangs blinkt die grüne LED am AeroWave schnell.
App einrichten: Öffnen Sie die Vivosun App auf Ihrem Smartphone oder Tablet und folgen Sie den Anweisungen auf dem Bildschirm, um die WLAN-Konfiguration abzuschließen und sich mit Ihrem AeroWave zu verbinden.
HINWEIS: Stellen Sie sicher, dass die Vivosun App auf die neueste Version aktualisiert wird, um die Kompatibilität mit AeroWave E6 G2 zu gewährleisten.
GROWHUB CONTROLLER E42/E42A
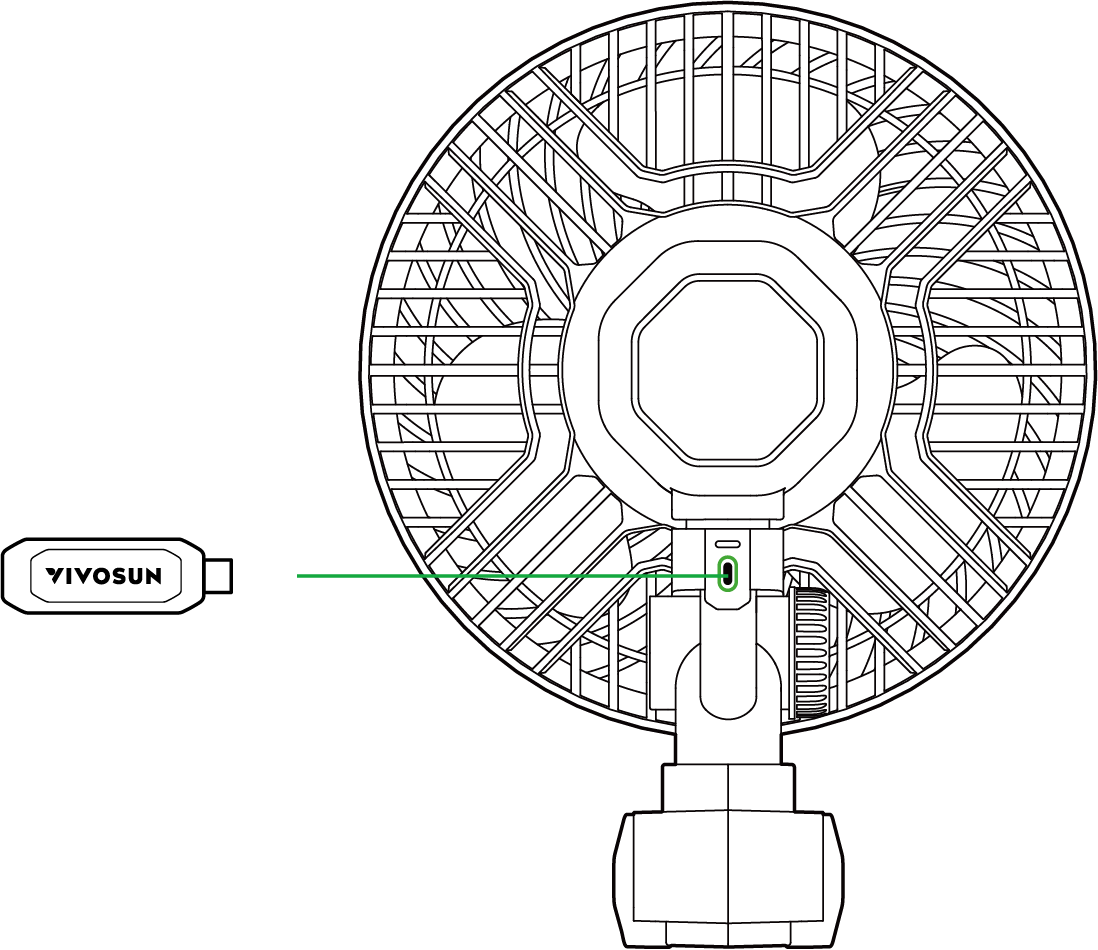
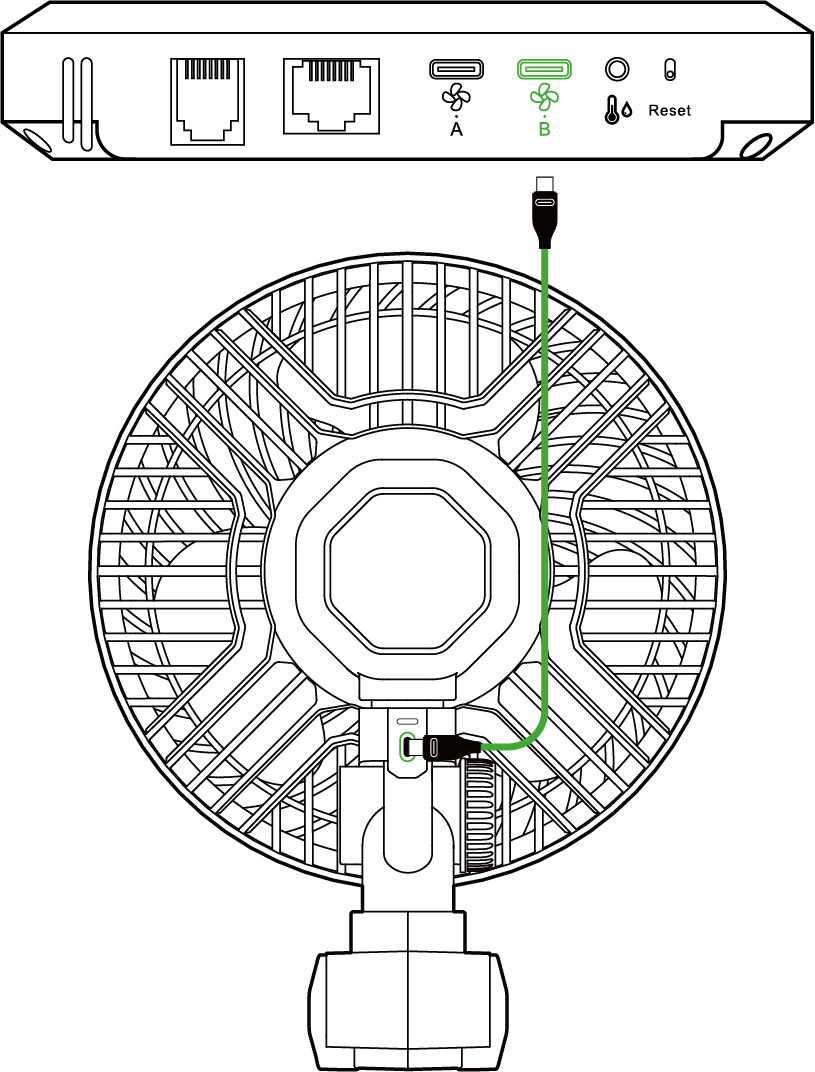
Stecken Sie das Typ-C-Verlängerungskabel in den Typ-C-Port Ihres AeroWave. Stecken Sie dann das andere Ende in den Port B des GrowHub E42/E42A Controller.
App einrichten: Öffnen Sie die Vivosun App auf Ihrem Smartphone oder Tablet und folgen Sie den Anweisungen auf dem Bildschirm, um die WLAN-Konfiguration abzuschließen und sich mit Ihrem AeroWave zu verbinden.
HINWEIS: Die Funktionalität von AeroWave E ist auf Port B des GrowHub Controller beschränkt.
SCHRITT 1
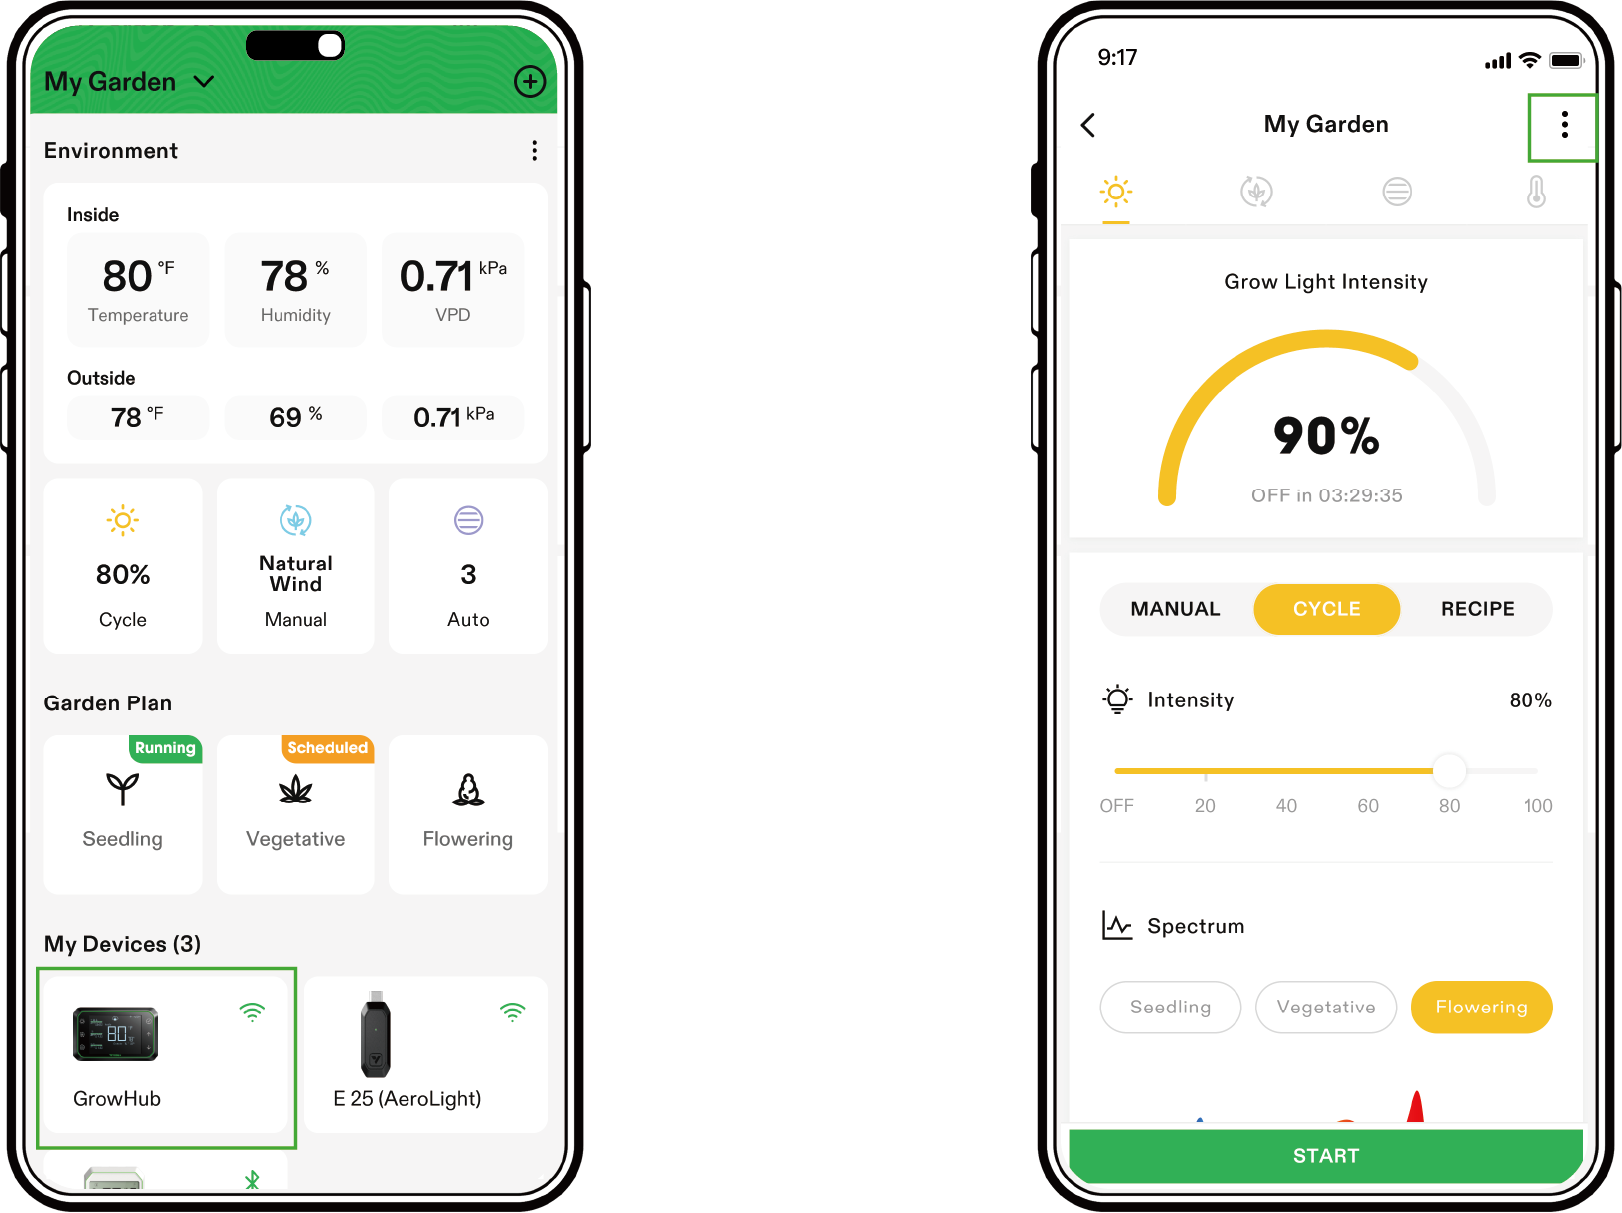
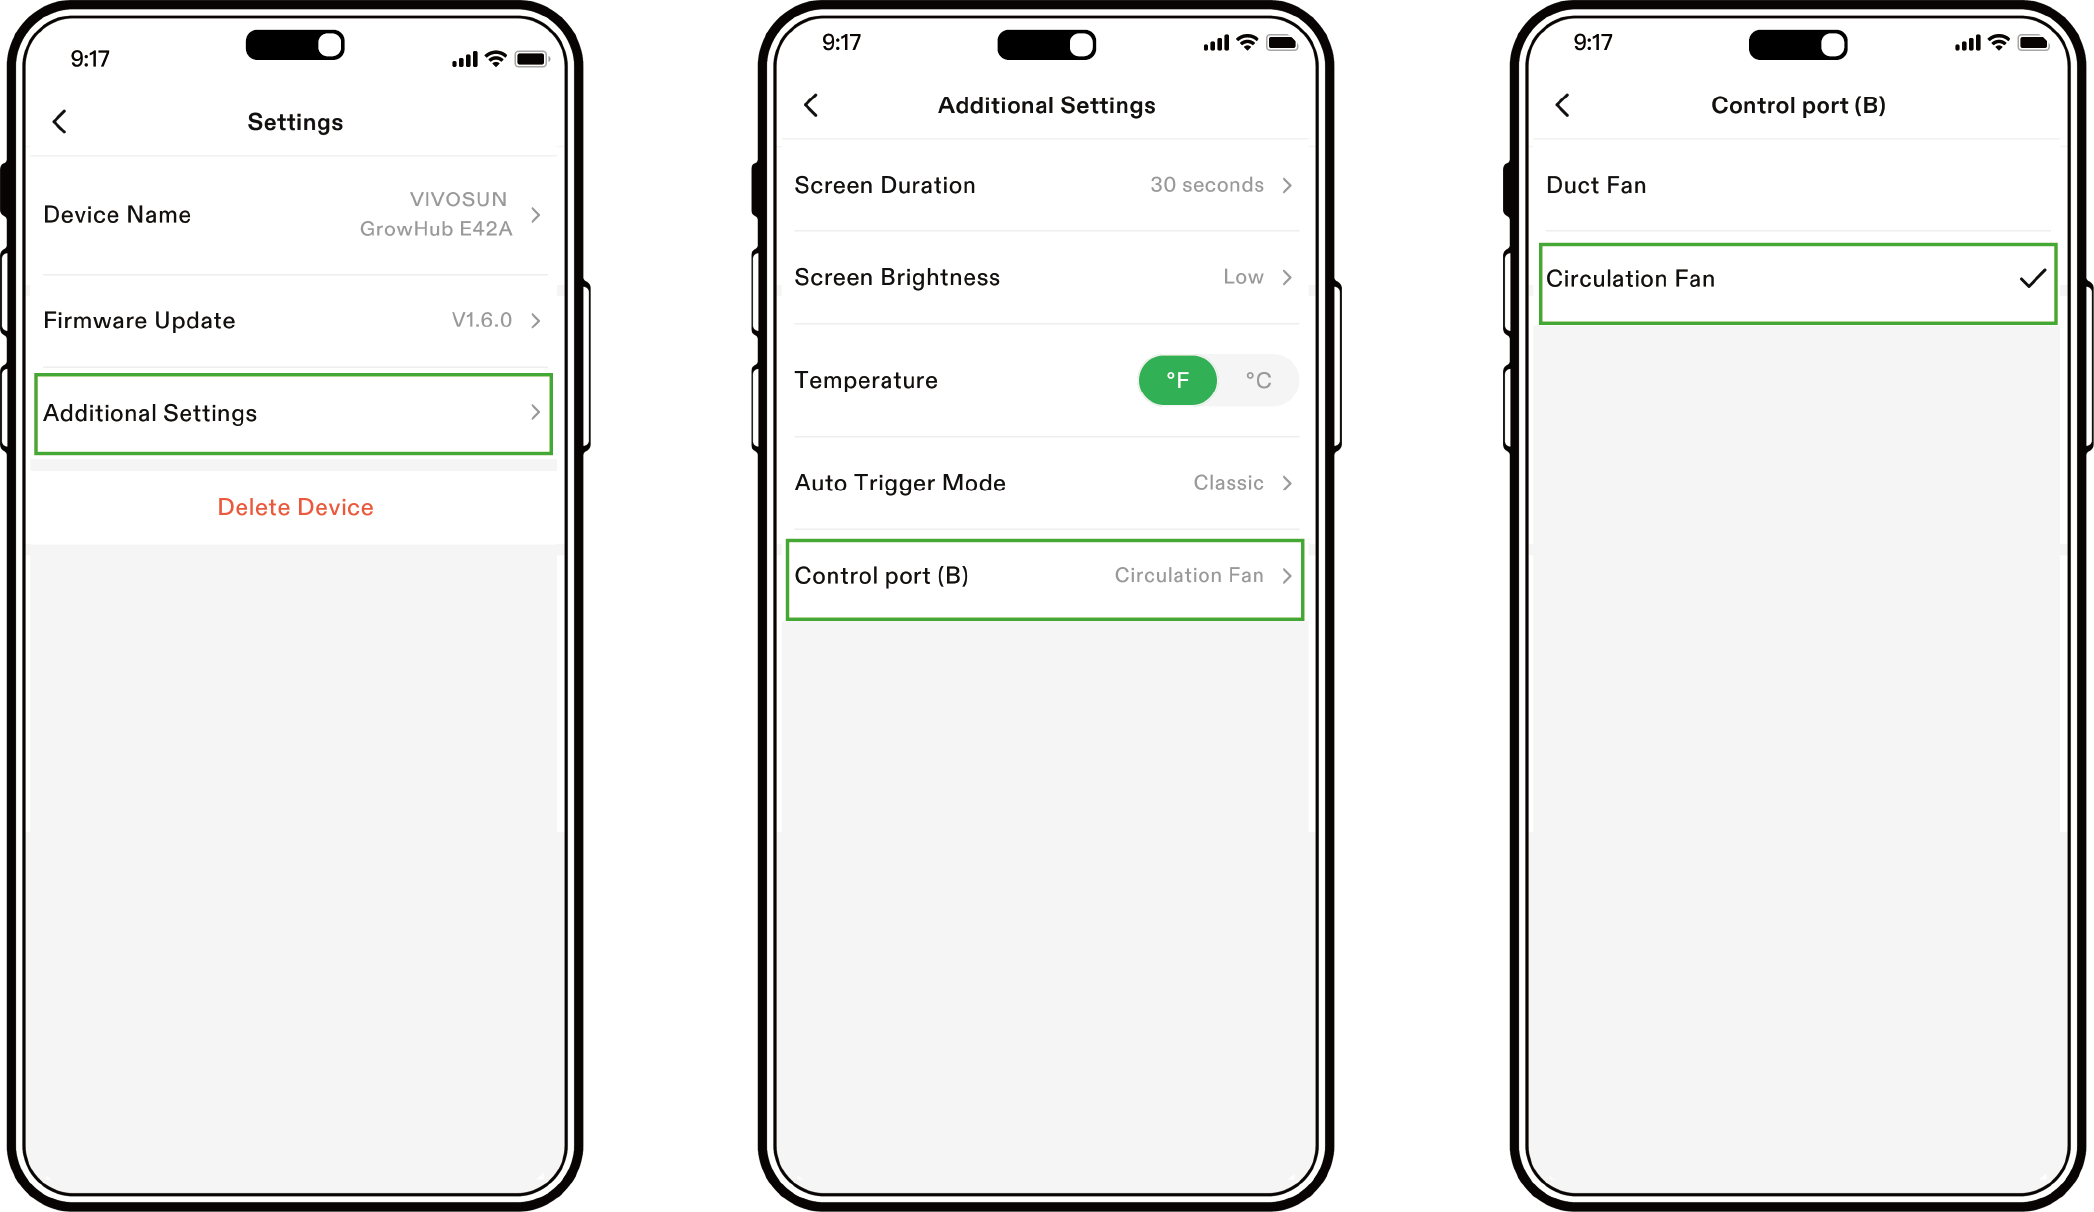
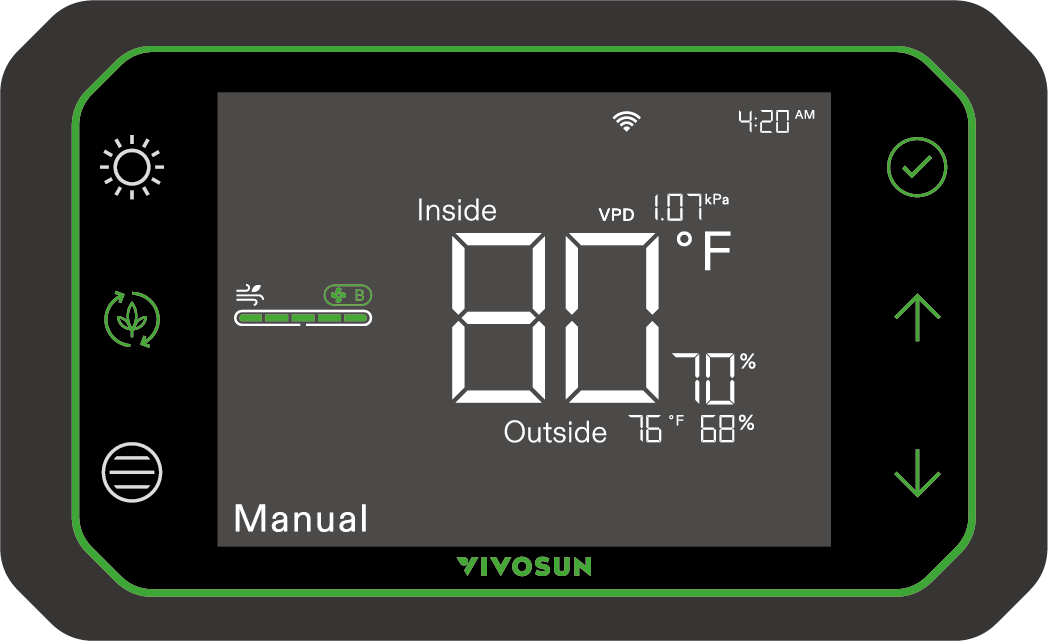
Öffnen Sie die Vivosun App, wählen Sie Ihren GrowHub E42/E42A aus und gehen Sie über das Symbol oben rechts in die Einstellungen. ![]()
SCHRITT 2
Klicken Sie auf „Zusätzliche Einstellungen“, um die Einstellungen für den Anschluss B anzuzeigen. Stellen Sie den Anschluss (B) auf Zirkulationsventilator ein. Jetzt können Sie AeroWave über den GrowHub E42/E42A und die Vivosun App steuern.
LOKALE EINSTELLUNG AUF E42A
Sie können AeroWave E auch lokal auf E42A einstellen. Halten Sie ![]() gedrückt, um den Port B auf die Steuerung des Zirkulationsventilators
gedrückt, um den Port B auf die Steuerung des Zirkulationsventilators ![]() umzuschalten, und das Symbol wird angezeigt. Jetzt können Sie AeroWave E lokal steuern.
umzuschalten, und das Symbol wird angezeigt. Jetzt können Sie AeroWave E lokal steuern.
HINWEIS: Die Anzeigen des AeroWave-Ventilators gehen aus, nachdem AeroWave erfolgreich mit dem GrowHub Controller E25/E42/E42A verbunden wurde. Sobald Ihr AeroWave mit dem GrowHub Controller oder der Vivosun App verbunden ist, können Sie die Ventilatorgeschwindigkeit über beide Methoden steuern: GrowHub Controller: Verwenden Sie die Steuerungen an Ihrem GrowHub Controller, um die Ventilatorgeschwindigkeit anzupassen.
Vivosun App: Öffnen Sie die Vivosun App auf Ihrem Smartphone oder Tablet und passen Sie die Einstellungen zur Ventilatorgeschwindigkeit in der App an.
E6 Gen2 SERIE
Steuerung |
Ventilatorgeschwindigkeit |
Natürl.Wind Einstellungen |
Oszillations-Einstellungen |
Zyklus |
Lokal |
5 Stufen |
5 Stufen |
5 Stufen |
√ |
E25/APP |
10 Stufen |
10 Stufen |
5 Stufen |
√ |
E42A |
5 Stufen |
EIN/AUS |
--- |
√ |
WARTUNG
Ziehen Sie immer den Netzadapter vor dem Reinigen des Ventilators aus der Steckdose. Reinigen Sie den Ventilator niemals, während er in Betrieb ist.
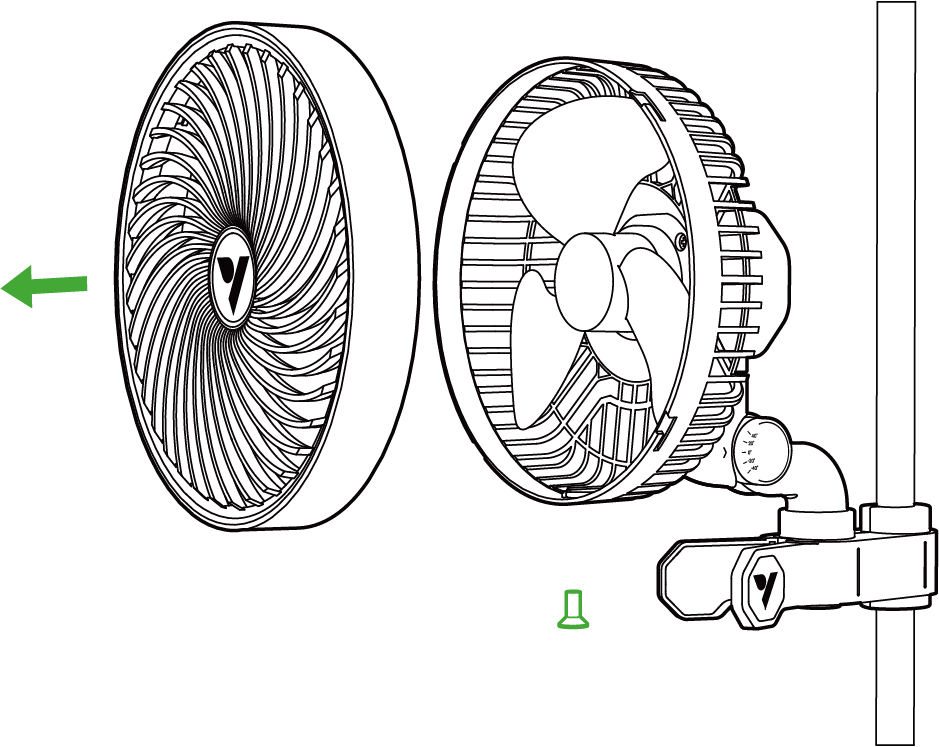
Schritt 1
Nehmen Sie den Ventilator wie folgt auseinander, bevor Sie das Gerät reinigen:
-
Lösen Sie die Befestigungsschrauben an der Unterseite der Frontabdeckung, indem Sie sie mit einem Schraubenzieher gegen den Uhrzeigersinn drehen.
-
Drehen Sie die Frontabdeckung gegen den Uhrzeigersinn;
-
Ziehen Sie die Frontabdeckung vorsichtig vom Gehäuse ab.
Schritt 2
Reinigen Sie Öl, Staub und Schmutz, indem Sie die Blätter und Teile mit einem weichen, feuchten Tuch abwischen und anschließend mit einem trockenen Tuch nachwischen. Verwenden Sie keine Benzin oder andere lösungsmittelhaltige Substanzen, die das Plastik oder die Farbe angreifen könnten. Biegen oder drücken Sie das Gerät beim Reinigen nicht zu stark, da dies die Blätter beschädigen könnte.
Schritt 3
Führen Sie Schritt 1 in umgekehrter Reihenfolge aus, um den Ventilator wieder zusammenzubauen.
Garantie
VIVOSUN bietet ab dem ursprünglichen Kaufdatum eine zweijährige beschränkte Garantie auf dieses Produkt, wenn es direkt bei uns oder unseren autorisierten Händlern erworben wurde. Diese Garantie gilt zusammen mit der erwarteten Nutzungsdauer von etwa 8.700–9.000 Stunden, sofern das Produkt unter normalen und vorgesehenen Bedingungen betrieben wird und die tägliche Nutzung 12 Stunden nicht überschreitet.
Diese Garantie gilt zusätzlich zu Ihren gesetzlichen Rechten nach den geltenden Verbraucherschutzgesetzen des Landes, in dem das Produkt gekauft wurde, und beeinträchtigt diese nicht.
Für die vollständige Garantiepolitik und zur Einreichung eines Anspruchs besuchen Sie bitte: https://www.vivosun.com/help/warranty-policy
Alternativ können Sie unseren Kundenservice unter support@vivosun.com oder +1 888-505-8486 kontaktieren.
WARNUNG
-
Dieses Gerät kann von Kindern ab 8 Jahren sowie von Personen mit eingeschränkten körperlichen, sensorischen oder geistigen Fähigkeiten genutzt werden, sofern sie beaufsichtigt werden oder über den sicheren Gebrauch informiert sind und die Gefahren verstehen.
-
Kinder dürfen nicht mit dem Gerät spielen.
-
Reinigung und Wartung dürfen nicht von Kindern durchgeführt werden.
-
Halten Sie das Gerät und das Kabel außerhalb der Reichweite von Kindern unter 8 Jahren.
-
Nach der Montage dürfen die Schutzvorrichtungen während des Gebrauchs oder der Reinigung nicht entfernt werden.
-
Wenn das Netzkabel beschädigt ist, muss es vom Hersteller, seinem Kundendienst oder gleichwertigen Personen ersetzt werden, um Gefahren zu vermeiden.
-
Stecken Sie während des Betriebs keine Finger, Stifte oder andere Gegenstände in das vordere Gehäuse.
-
Berühren Sie niemals den Stecker oder die Steckdose, wenn Ihre Hände nass sind.
-
Stellen Sie das Gerät nicht in die Mikrowelle.
-
Verwenden Sie nur das mit dem Gerät gelieferte Kabel. Verwenden Sie keine Drittanbieter-USB-Kabel, die nicht speziell für dieses Gerät ausgelegt sind.
ENTSORGEN SIE DIESES PRODUKT NICHT MIT IHREM REGULÄREN MÜLL. Elektrische Geräte enthalten gefährliche Materialien, die die Umwelt schädigen können, wenn sie nicht ordnungsgemäß entsorgt werden.
Bitte wenden Sie sich an Ihre örtliche Behörde, um Informationen über Sammelstellen oder Recyclingprogramme in Ihrer Nähe zu erhalten, die Elektroschrott annehmen.
Contents

We help you grow your best green.

We provide the highest quality.

We relentlessly pursue the future.

We make growing more enjoyable.

We support every grower.
Sign up and get 10% off your first order
©2026 Vivosun All Rights Reserved